BLOG
Linux Coherent Printing System (CPS) - Printer Service
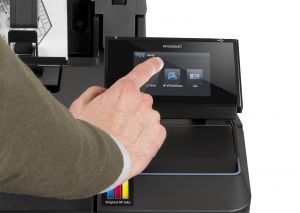
According to Printer Repair Hub, an HP printer service center Dubai, HP printer repair in Dubai has historically been a problem because of, well, the history of HP printer error codes and diagnosis of the printer problems. Since HP Laserjet printer is based on Laser technology, which has a history stretching back to the middle-ages (1960’s), the HP printing arrangements which most systems come with are geared, or at least have elements from, the HP printer repair needs in Dubai of that time. HP printer repair Dubai has been struggling to cope with the situation mind. Before installing the CPS script, make sure you have installed the latest HP printer driver on your machine. If you are facing any issues with your HP printer or Designjet plotter, like paper jams, or printer errors call the nearest HP printer service center Dubai to solve the printer problems.

These needs can be summed up as: Either very high or very low-quality printing for large organisations. In the days before laser printing became cheap many systems had “draft” printers and “final” printers which varied in quality and cost.
Today many homes and small offices have Unix/Linux systems attached to a single inkjet which is operated in several modes, and sometimes also to a black and white laser printer.
Two problems arise with this setup and current Linux printing methods. One is the basic issue of getting good drivers for inkjet printers, which is now largely solved, and the other is the fact that Linux’s traditional print services do not understand the idea of multiple virtual printers on the same physical printer (i.e., a single inkjet which can print in various radically different modes). HP plotter service center in Dubai
If your printer is aging and you need a new spare part, or if the old one just isn't working right any more, it's time to start looking for a replacement. Luckily, there are many sources for printer spare parts.
There are companies that specialize in supplying printer spare parts, or entire printers, and there are also general-purpose online retailers that sell printer parts and hardware. To find the best source for your needs, it's important to do some research first. Find out what kinds of replacement parts are available and what the buyer's experience has been with different suppliers.
In addition to finding a replacement part supplier, you'll also want to make sure you have the correct connector for your printer model. Many of the connectors sold as printer spares were originally designed for different printers, so be sure to get the right one. And lastly, always verify that the part you're purchasing is compatible with your specific model before ordering it.
No matter where you look for printer spare parts, be sure to read the product reviews and compare prices before making a purchase. Doing this will help you save money and avoid unpleasant surprises down the road.

Printer Repair Hub Dubai, an HP printer repair Dubai company services all HP printers at an affordable price.
Many, many, many solutions have been proposed for fixing Linux printing but most have concentrated on large organisations and their security and bulk issues. I run a very small IT Department with two printers and four machines behind a firewall. I am thus more interested in utility than security so implementing eight RFC’s is right out!
Other issues with current systems include the inability to handle TrueType fonts (CUPS, for example, was originally based on a buggy version of Ghostscript and died when ComicSans or Verdana is used in a job. Even today CUPs is based on a very old version of Ghostscript), and the difficulty of users manipulating the settings of the printer from within programs which have no understanding of the print control system being used.
Ironically, this last point is the key to getting a decent system running: by using the ignorance of StarOffice, Dvips, Mozilla, or Opera it is possible to construct a print daemon which actually allows the normal user to access all their printers’ settings without any special permissions or resorting to GUI tools which fail when accessing the print server over telnet or which require root permissions to set the paper size.
The solution, which I will call CPS (Coherent Printing System), is a set of Perl scripts called “lpr”, “lpd”, “lprm”, and “lpq”. These replace the programs of the same name which come with many Linux systems.
...
PostScript, Ghostscript, Space and Time
The basis of my approach is this: EVERYTHING IS POSTSCRIPT OR RAW.
By “raw” I mean already converted into a data format that the printer actually understands directly (which in some cases might include pure text). The output from The Gimp’s print command is raw, for example.
Most other printing systems try to guess what to do by looking at a print job and applying “magic filters” to convert it to the printer’s internal format. This is a nightmare of configuration and maintenance which serves no purpose in many cases. Put bluntly, I know if my file is Postscript or not and I generally have a better idea of how to get it into that format than any “smart” filter program.
In practice things are even better, almost all Linux programs can output Postscript of a very high standard. We just send this to the print system! In the case of plain text, also, it is fairly trivial to convert this to Postscript automatically. Everything else should be under the user’s control.
This means that the printer driver must understand PostScript and be able to output the raw printer format. This means Ghostscript, a free program for translating PostScript to various other printer languages. Since Ghostscript (from version 6.5 onwards) also understands TrueType fonts even a genuine PostScript printer can benefit from its use in embedding fonts into print jobs.
One big bonus of this approach is that each client machine to a remote print server needs nothing more than the client software; the driver and print daemon are centralised on the server which makes maintenance very simple; a printer can be replaced at the server end without affecting remote machines which are printing using the global defaults. In particular, in a situation (as in our office) where there is a printer on the Linux server and another on a Windows machine, the server is set up to use the Windows printer via Samba and the clients still just send their jobs to the Linux server; they need never know that the job ends up being sent to the Windows machine.
Text...
Requirements
Apart from Perl itself, you will also need the Perl modules IO::Socket, Fcntl, and Getopt::Long and POSIX for the server. As far as I know, these are all included with the base Perl distribution.
Is There Any Point?
This system will run any printer which is in the list of supported printers at the Linux printing site, as well as any genuine PostScript, or PCL level 1-5 printer (PCL 6 might work too).
If your printer is not on the list as at least “Partially” supported then go no further; I don’t know what you can do.
Cleaning out the Stables
You will probably be best off just removing any of the following if you have installed them from binary formats such as RPM or even DEB. When removing old versions bear in mind that you will be replacing it again with more up-to-date versions so you can ignore dependency errors from your package manager, if you have one.
Gimp Print and Other drivers
If your printer needs gimp-print (see the list of supported printers at the Linux printing site then it from the main site, after removing any existing version. You should get at least version 4.2.0 (at the time of writing this is the latest stable release, but version 4.2.6-pre2 has just been announced). Some printers use other drivers, such as Omni from IBM. The best guide to what’s needed is at Gimp-print or old Version)
NEVER USE GHOSTSCRIPT VERSIONS PRIOR TO 6. These are obsolete and have too many problems with no advantages. Except for this, you do not need a new version of Ghostscript unless you are using the Gimp-print driver.
Assuming that you need a new version of Ghostscript then, if you have not got the source code for the most up to date version of Ghostscript that you can use, delete any version you have installed (remembering to keep your Fontmap.GS file if you have modified it).
Since Ghostscript version 7 came out the interface between it and Gimp-Print has been incorporated as standard and it is now feasible to install both programs from binary packages.
Gentoo users can just emerge the packages as normal.
Foomatic
Foomatic‘s source is downloadable from the Linux printing site. Foomatic now (version 3.0.0+) natively supports CPS which makes life easier.
Again, if you have an older version of Foomatic delete it.
Re-inventing the Wheel
The next step is to install a version of Ghostscript that understands the Gimp-print driver if needed. As mentioned earlier, Versions 7.05 and later do include detection of Gimp-print and they should be used.
One other big hint is that if you are compiling Ghostscript from source, it requires the source for the jpeg library from Independent JPEG Group’s website and this needs to be placed inside the Ghostscript source tree in its own directory called “jpeg”, i.e., its full path will be something like /usr/src/ghostscript-6.52/jpeg.
Next, download and install the latest version of Foomatic. Again, I’ll leave detailed instructions until later, the important thing to watch out for is that you have told the makefile the correct place to install the Perl modules.
Ready?
Okay, if you’ve been reading from the start you’ll have everything you need to use Foomatic and Ghostscript to convert Postscript into whatever it is that your printer uses.
Configuration Files &
Foomatic Configuration
The system now needs to know about the printer(s) you have connected so that the correct output can be generated.
This is done using the program
cpsinstall
This utility will ask you for the make and model of your printer by listing all the options recognised by your copy of Foomatic in a series of lists (It’s best if you can run this under an xterm as some of the makers have literally hundreds of models to select from). Once you have selected the correct printer you will be asked which “bank” the printer is part of.
Banks of Printers
If you have several printers of the same model you can make them into a “bank” of printers such that they share a spool directory between them and share the printing of the jobs submitted to that queue.
This is simply achieved by listing more than one device in the printcaps entry for the virtual printer that represents the bank. For example, the printcap entry
colour:sd=/var/spool/lpd/epsons:\ :lp=/dev/usb/lp0:lp=/dev/usb/lp1:\ :lp=/dev/lp0
would represent a bank of three printers (called ‘colour’) connected to a single machine via its parallel port and two USB ports. cpsinstall will try to generate a printcap file for you but it may fail if another program has already generated a printcap file. A printer may not appear in more than one bank and a bank may consist of a single printer.
Advanced Printcap
The following is for advanced users who wish to manipulate their printcap file for special applications.
In the directory ‘/etc’ lives a file called printcap which has, since the early bronze age, defined the operating parameters of Unix printing systems. CPS uses this file but I’ve not bothered too much about keeping all the arcane options from older systems.
In brief, printcap consists of one entry per virtual printer, each such entry starts on a line with no leading spaces and continues to the end of the file or to the next line with no leading spaces (i.e., the next printer definition).
Each printer definition is divided into fields by colons (“:”) and a field may consist of a keyword or a keyword and a value (e.g., “sd=/var/spool/lpd/epson/”). The first field in a definition must be the virtual printer’s name (with any aliases separated by a “|”).
Definitions that go onto another line should have the previous line terminated with a “\” and the continuation must start with an indent of whitespace.
All lines starting with a “#” are discarded and ignored. In CPS the set of keywords is much smaller than the dozens understood by traditional systems:
KeywordPurposeExample
lpThe device that the physical printer is connected to. This is duplicated for each virtual printer which maps to the same actual printer.lp=/dev/usb/lp0
fakeIndicates that the device is not a real hardware device, perhaps it is actually a script or program (such as sambaspool).fake=trueis the only option other than omitting the entry altogether.
sdThe directory where jobs for this virtual printer are spooled to. This should be the same for each virtual printer on a particular real printer for clarity, although it does not have to be. Not used for remote printers.sd=/var/spool/lpd/epson/
rmThe name of the machine running the print spooler if printing is not done on this machinerm=beta.ourdomain.co.uk
rpThe name of the virtual printer to use for a remote print job.rp=lino
More will be added, in particular, maximum job size and accounting data.
Here’s an example:
More will be added, in particular, maximum job size and accounting data.
Here’s an example:
#A Comment. grey:\ :sd=/var/spool/lpd/epson:\ :lp=/dev/lp: a3grey:sd=/var/spool/lpd/epson:lp=/dev/lp: a3bw|big:sd=/var/spool/lpd/epson:lp=/dev/lp: lp|colour:\ :sd=/var/spool/lpd/epson:\ :lp=/dev/lp: draft|bw:\ :sd=/var/spool/lpd/epson:\ :lp=/dev/lp: photo:\ :sd=/var/spool/lpd/epson:\ :lp=/dev/lp: #Final film setter photoset:\ :rm=ariel:\ :rp=deepthought:
Spool Directories
Print jobs for a bank of printers (which is often just a single printer, remember) go to a directory called /var/spool/lpd/<bankname>. These directories should also be owned by lp. They should be globally writable and have the sticky bit set (chmod 1777 <printer name>). Again, cpsinstall should do this automatically for you.
Spool Directories
To find out what options your printer has used the following command line:
lpr -P<printer name> -D
If you want to simply have a single virtual printer running on a single physical printer using all the default settings for that printer then there are no further configuration files to create.
To create a virtual printer you first create the entry for the virtual printer in printcap as described previously.
Next, using the printer documentation you printed out, put the options you want set for this printer and their values one line at a time into a file called ‘printername.options’ in the spool directory for the physical printer.
As an example here’s the options file for my Stylus Photo when called as the virtual printer ‘draft’ (by typing lpr -Pdraft):
PageSize=A4 Quality=360sw GSResolution=360x360DPI ImageType=Photographs OutputType=BlackAndWhite Dither=Fast
This is stored in a file called “draft.options” in the directory /var/spool/lpd/epson. Another example from the same directory, called “photo.options” contains the options for printing high-quality output onto photo-quality paper:
PageSize=A4 Quality=1440x720sw GSResolution=1440x720DPI ImageType=Photographs OutputType=Color MediaType=Photo
As usual, these files should be owned by lp and only writable by lp too, although everyone should be able to read them.
Local Options
Normal users may also have these option files in their home directory, where they are prefixed with “.”, e.g., “.lp.options” These override the values set in the spool directory. Currently, there is no restriction on what can be overridden but there will be in future releases.
Security
There is a range of security mechanisms in CPS: it runs as user lp (after the initial opening of the socket), access control via hosts.lpd and job removal using security tickets.
Hosts.lpd
At startup, the CPS daemon looks for the file /etc/hosts.lpd and, if it exists, reads it in looking for whitespace-delimited fully qualified hostnames (eg, alpha.localdomain lpd.bigboy.acme.net). Only these hosts and the local machine will be allowed to submit jobs to the queues on the daemon’s machine.
If hosts.lpd does not exist then any machine which can reach the spooler host can submit jobs. This is recommended only if behind a firewall which prevents the public accessing the spooler.
Security Tickets
When a job is submitted across the network (ie, not locally) a checksum is generated on the client machine and recorded in a file whose name is of the form .lpd<job number>-<spooling host>.sum in the user’s home directory. Since these names start with a dot they should not appear in normal directory listings.
When a remote job is cancelled, the ticket for the job is sent with the request as proof of ownership. The ticket is deleted at this time.
Stale tickets (ie, those belonging to jobs which have been printed) are swept up on an ad-hoc basis when lpq is run.
Notice that the checksum is only sent across the network when the delete request is sent. Spoofing a delete therefore requires that the entire job was sniffed on its way to the printer (thus allowing the checksum to be calculated) or that an attacker guess the checksum. Since the checksum is currently only 32bits, this is not insanely difficult but later versions will extend this.
Printing from Windows
Queue control is not currently operative from Windows so the issue of having permission to delete a job does not come up. Once it is, however, there will be the problem of the Windows machines not generating tickets. The options then will be to either not allow Windows users to delete jobs or to allow anyone to delete any job.
Moot until queue control works over Samba.
The Download
Unless you’re the sort of person that clicks on every link you’ll now need to download the CPS Perl files. Put them in /tmp and uncompress with
tar xzvf cps.tgz
This will create the files lpr, lpd, lprm, lpq, and cpsinstall inside a directory “cps”, along with a copy of this documentation, a change log and a makefile.
Installation
cd into the cps directory. For client machines type “make client”, for server-only machines type “make server” and for client/server machines just type “make”. This will put the software into /usr/local/bin/ and the docs into /usr/share/doc/cps. The make file is trivially editable if this does not suit.
On server machines set the owner of the devices which are connected to the printers as lp:lp. On most single printer systems this involves typing “chown lp:lp /dev/lp”. Then run the command “cpsinstall” and follow the prompts (remember to be logged in as root).
LPD
The program ‘lpd’ should be started on the print server by the user ‘root’ with something like:
lpd& exit
This can be arranged using a startup script which will feature in a future release.
Note that lpd needs only to be installed on the machine doing the actual printing; client machines do not need a copy of lpd.
- Lpd listens for connections on port 515. This is used only if a remote system wishes to send a job to the server.
- No switches or parameters are read in at run time.
- Lpd needs to be restarted if a new physical printer is added but not if a new virtual printer is added to printcap.
- The TERM signal should lead to a clean shutdown and HUP causes lpd to check that all subdaemons are still running.
LPR
The program ‘lpr’ sends jobs to a print queue and can be executed by any user in the form:
lpr [-P <virtualprinter>] [-D] [-c <#copies>] [-J|-T <jobname>] [-s] [-o <otheroption>...] [filename]
- <virtualprinter> is the name of the printer, default=’lp’.
- -D requests a print out of the documentation for the selected printer. All other options or filenames will be ignored.
- <jobname> is string which will be stripped of all non alphanumeric characters (ie [^a-zA-Z0-9_]).
- -c is the number of copies required. These will be collated, ie each copy is fully printer and then the next rather than printing n-copies of each page and then the following page.
- -s indicates that the job should not be copied to the spool directory but symbolically linked instead.
- <otheroption> is any other option which the user wants to be passed through to the driver. An example is ‘-o raw’ to indicate raw data. Any of the options which appear in the printer’s documentation can also be used, e.g., ‘-o PageSize=A3’. These override both the global .option file and the user’s local .option file
If no filename is given then input is taken from standard input.
The print daemon (lpd) does not need to be running to queue local print jobs, but a remote printer must have a listening daemon.
LPRM
The program ‘lprm’ is used to remove items from a queue and is invoked in the following way:
lprm [-P <virtualprinter>] [jobnumber]
- If no printer is given then ‘lp’ is used.
- If no job number (obtained from lpq) is given then the topmost job owned by the user on the virtual printer is the target.
- If the job number is given as ‘-‘ then all the user’s jobs on the virtual printer are removed.
- The user ‘root’ is classed as owning all local jobs.
- Jobs which were accepted accross the network are listed locally as belonging to ‘root’.
- Currently, jobs being removed across the network must have a job number specified on the command-line.
The printer daemon (lpd) does not need to be running for lprm to work on local queues.
LPQ
The program ‘lpq’ outputs a list of jobs currently in the queue of a physical printer, with the currently printing job at the top and the job at the back of the queue at the bottom of the list.
lpq [-P <virtualprinter>]
- If a virtual printer is not specified then it is taken to be ‘lp’.
- The physical printer chosen is the one the given virtual printer maps to and all jobs on that printer are listed, not just ones for the virtual printer.It is assumed that the user is interested in how long it will be before a job is printed rather than just in what jobs are being sent to a particular virtual printer.
The virtual printer associated with each job is also listed. Other output details are subject to change.
As with lpr, this will give details on a remote queue only when an lpd daemon is available on the remote machine but will give information on local queues even when a daemon is not present.
Samba Printing - Linux to Windows
Samba is a system for sharing files and printers with Windows machines on a local network.
CPS treats a Samba printer on a Windows machine in the same way as any other local physical printer, i.e., it should have its own spool directory and .foo file, and each mode that the printer can operate in is defined using the virtual printer system in the same way as any other printer.
The ‘lp’ entry in /etc/printcap should contain the Samba path to the printer, e.g., ‘//ourworkgroup/paulsmachine/bigbertha’ to print to a printer shared as “bigbertha” on a machine called “paulsmachine” in the workgroup “ourworkgroup”, which the print spooler should be a member of.
There should also be a “fake” entry in the printcap file for the printer.
The $postpipe line in the .foo file for this printer should be set to
$postpipe='| smbspool smb:$LPDDEV '."$$ $< cpsJob 1 ''";
Most of the parameters in this line do nothing but smbspool fails on me when they are left out.
Windows to Linux
Printing from Windows to a CPS system is trivial, assuming that samba is running on the print spooler. The printer being shared should be listed as a postscript printer in the Samba configuration file.
First download the Adobe Generic PostScript driver. Install this using the .ppd file for the printer, generated by Foomatic.
If you don’t have the generic PostScript driver then just install it as a “Linotronic 100”; this usually works well for me.
Recent Posts